This guide is for less technically inclined users that want to create a LUKS encrypted Linux OS image.
You will need WSL2 installed or a Linux sytem. There are many guides on the internet to install WSL2 in your Windows 11 system, one example is this one.
You will also need to setup a private/public key pair to use for SSH login. We recommend pubkey logins instead of traditional root passwords.
Download our LUKS image creation tool from the Knowledgebase area. Since this tool requires running as root in your local PC, check that the SHA256 hash matches 516208c39d83866059bc90ebfd75b2ab1f899b519b25f6b728be48586f1464ca.
Its a collection of pure Python scripts and licensed as MIT. No warranty is provided.
Uncompress it into your preferred folder. In this example we will use WSL2 on Windows 11.
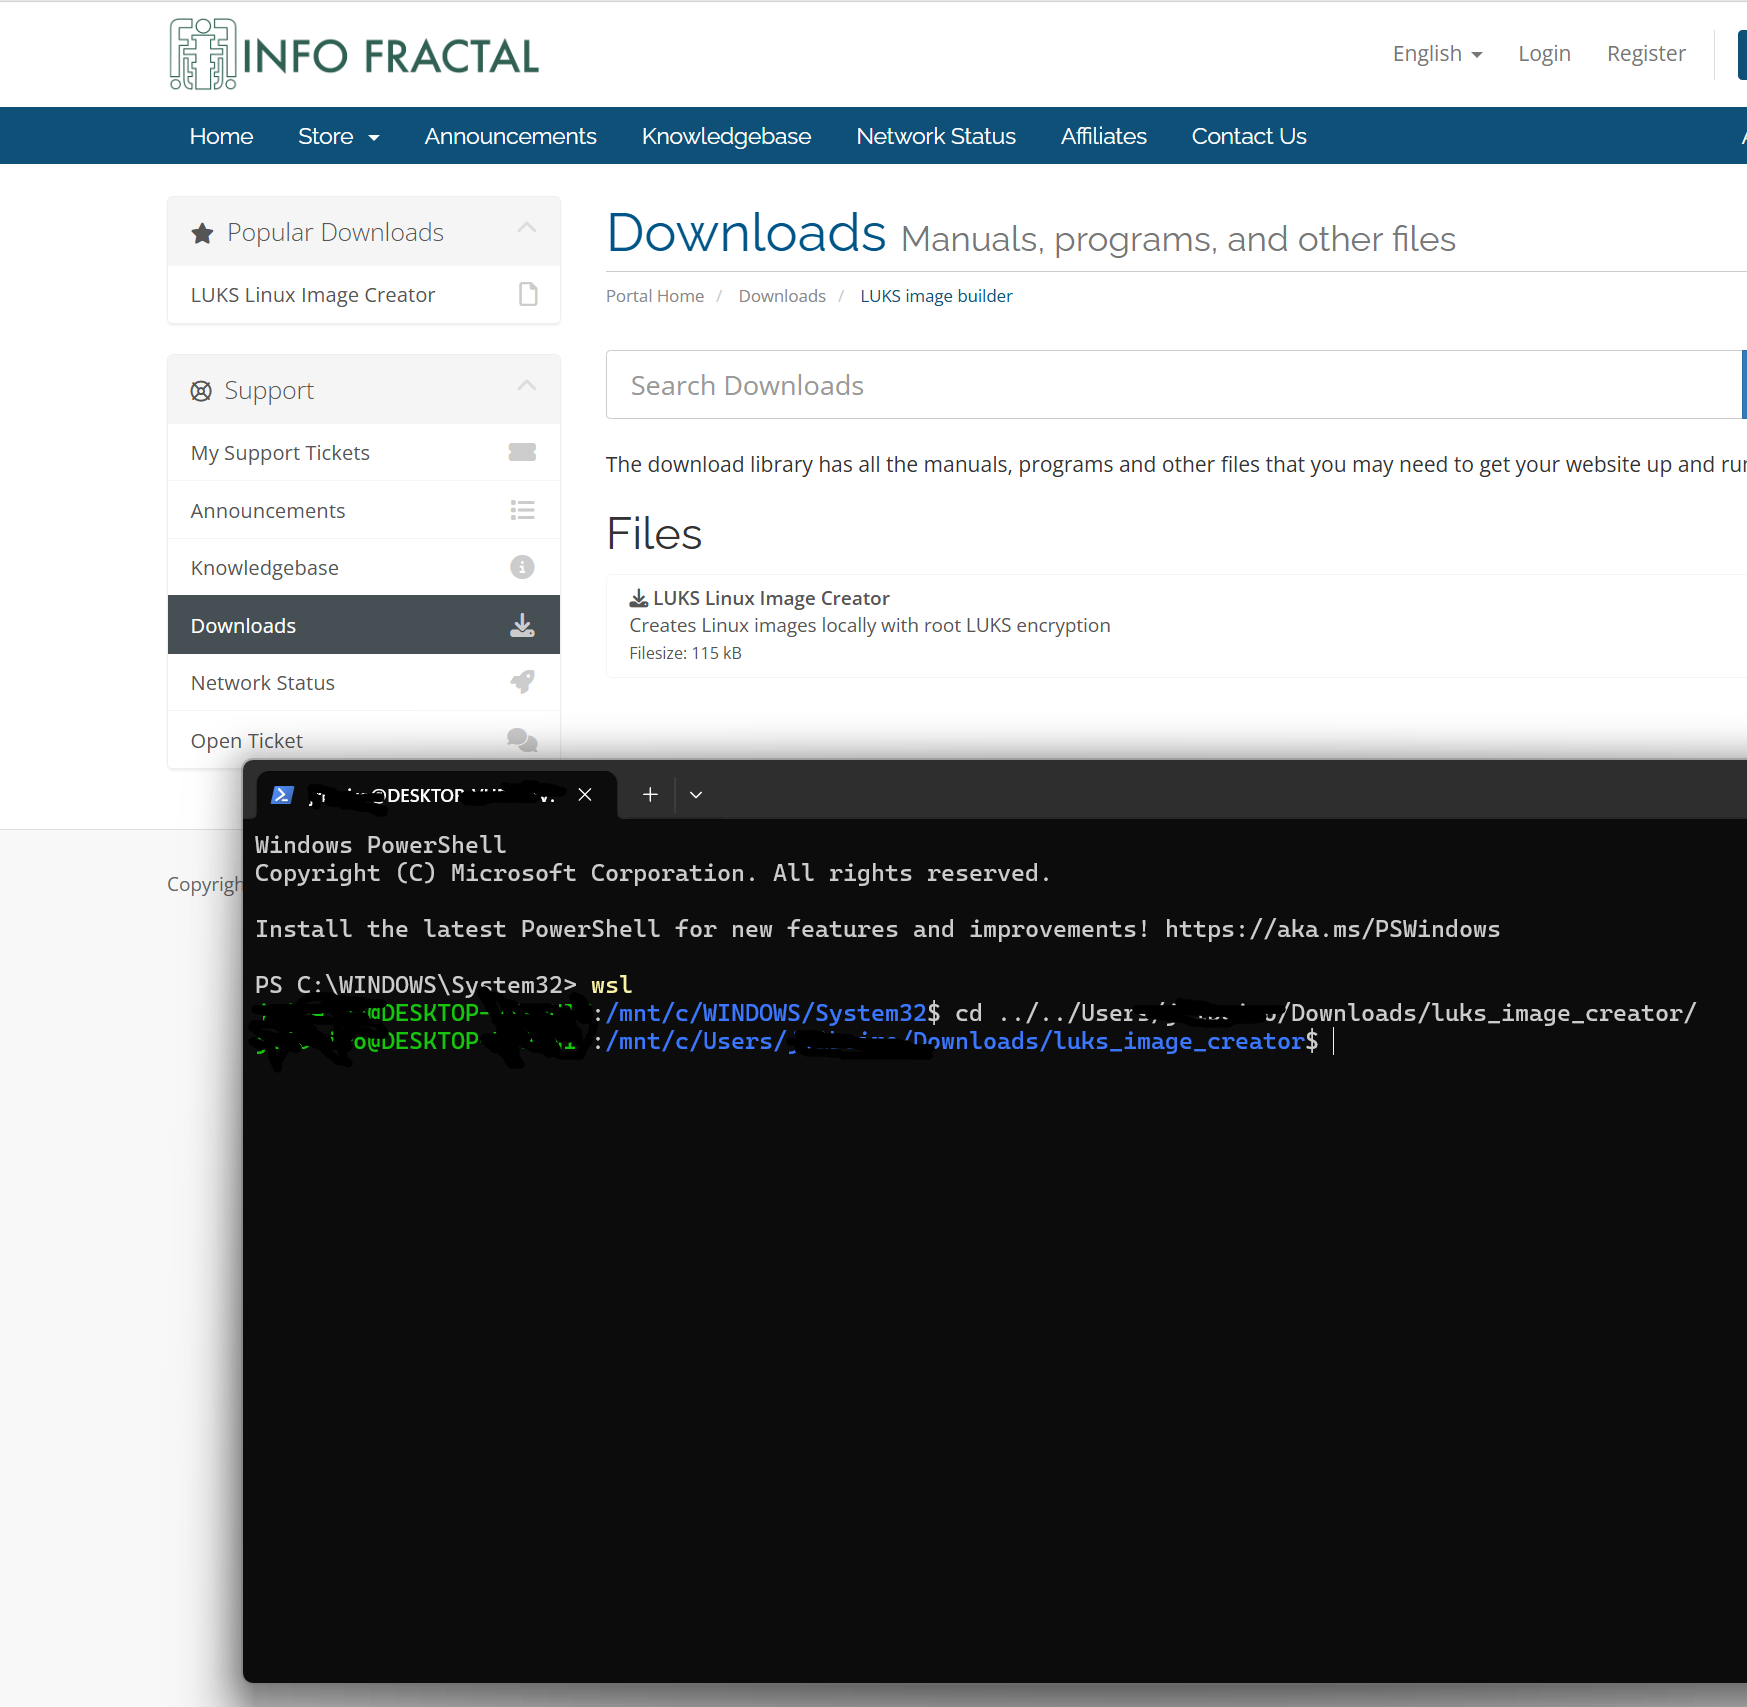
After downloading and uncompressing the tool, start WSL2 and change directories to it.
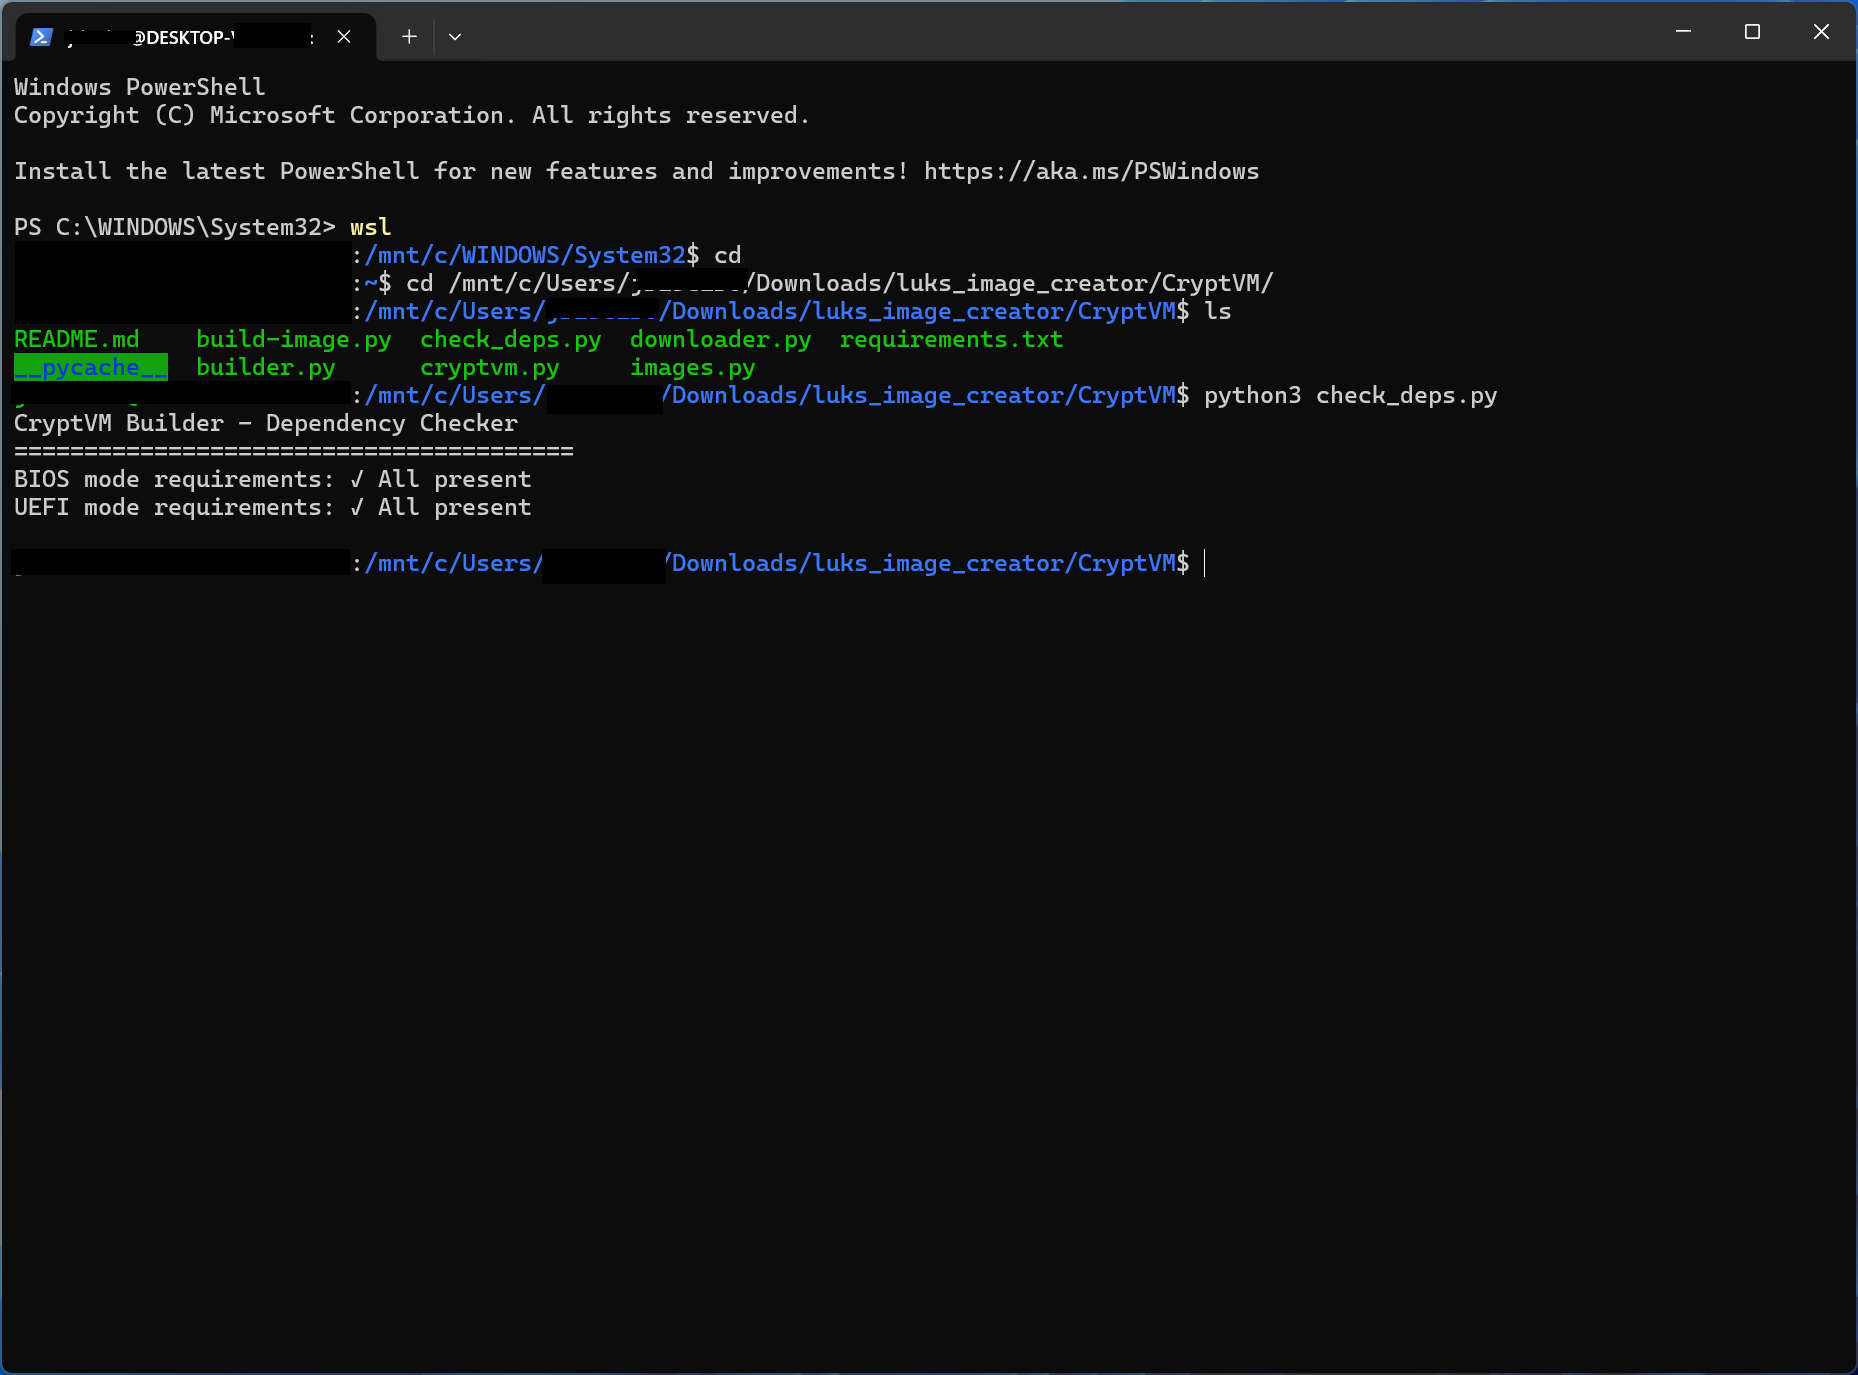
First run the "check_deps.py" script using python3. It will display the tools needed to create the images in case your WSL2 or Linux installation doesnt have them yet.
In this case all the tools are ready, so we will proceed to the next step.
Switch to the root user, as the script needs to use loop devices to prepare the image.
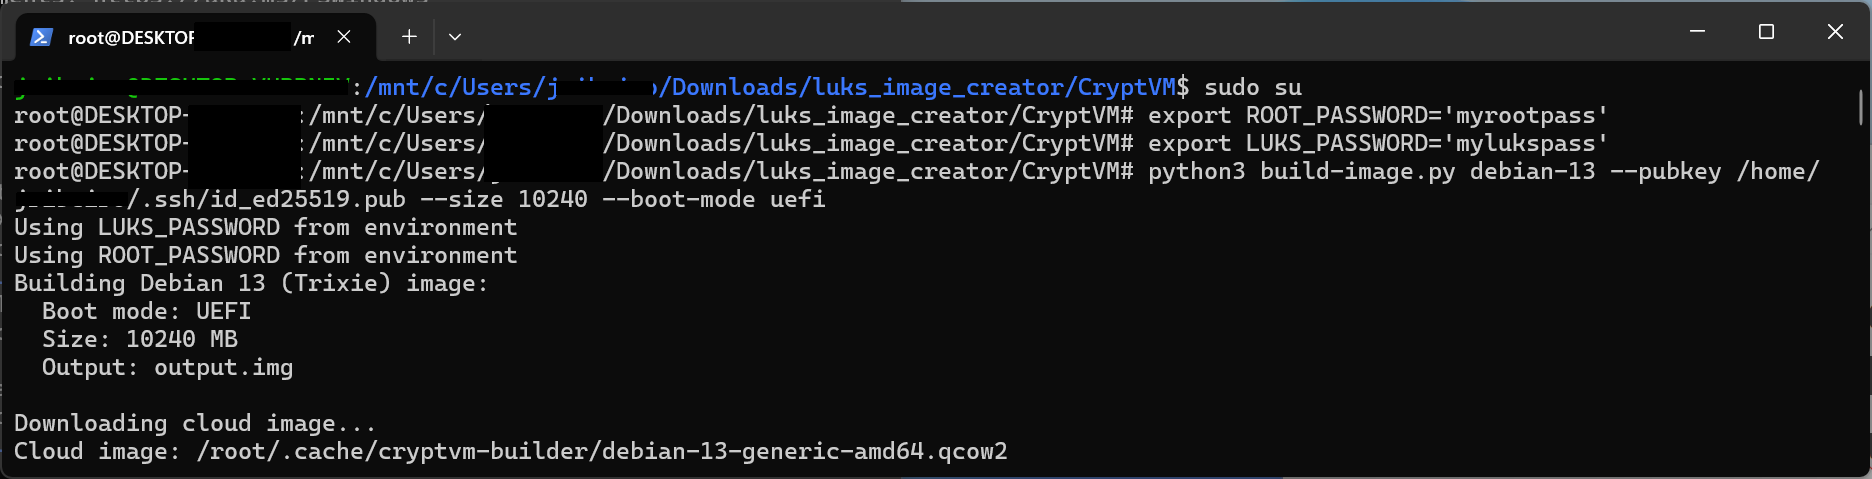
In this step we will setup two environment variables, ROOT_PASSWORD and LUKS_PASSWORD. These are the root and luks passwords respectively.
Then, we will create a debian 13 image. The "--boot-mode uefi" argument is required if you want to use SEV-SNP in the Epyc VPS.
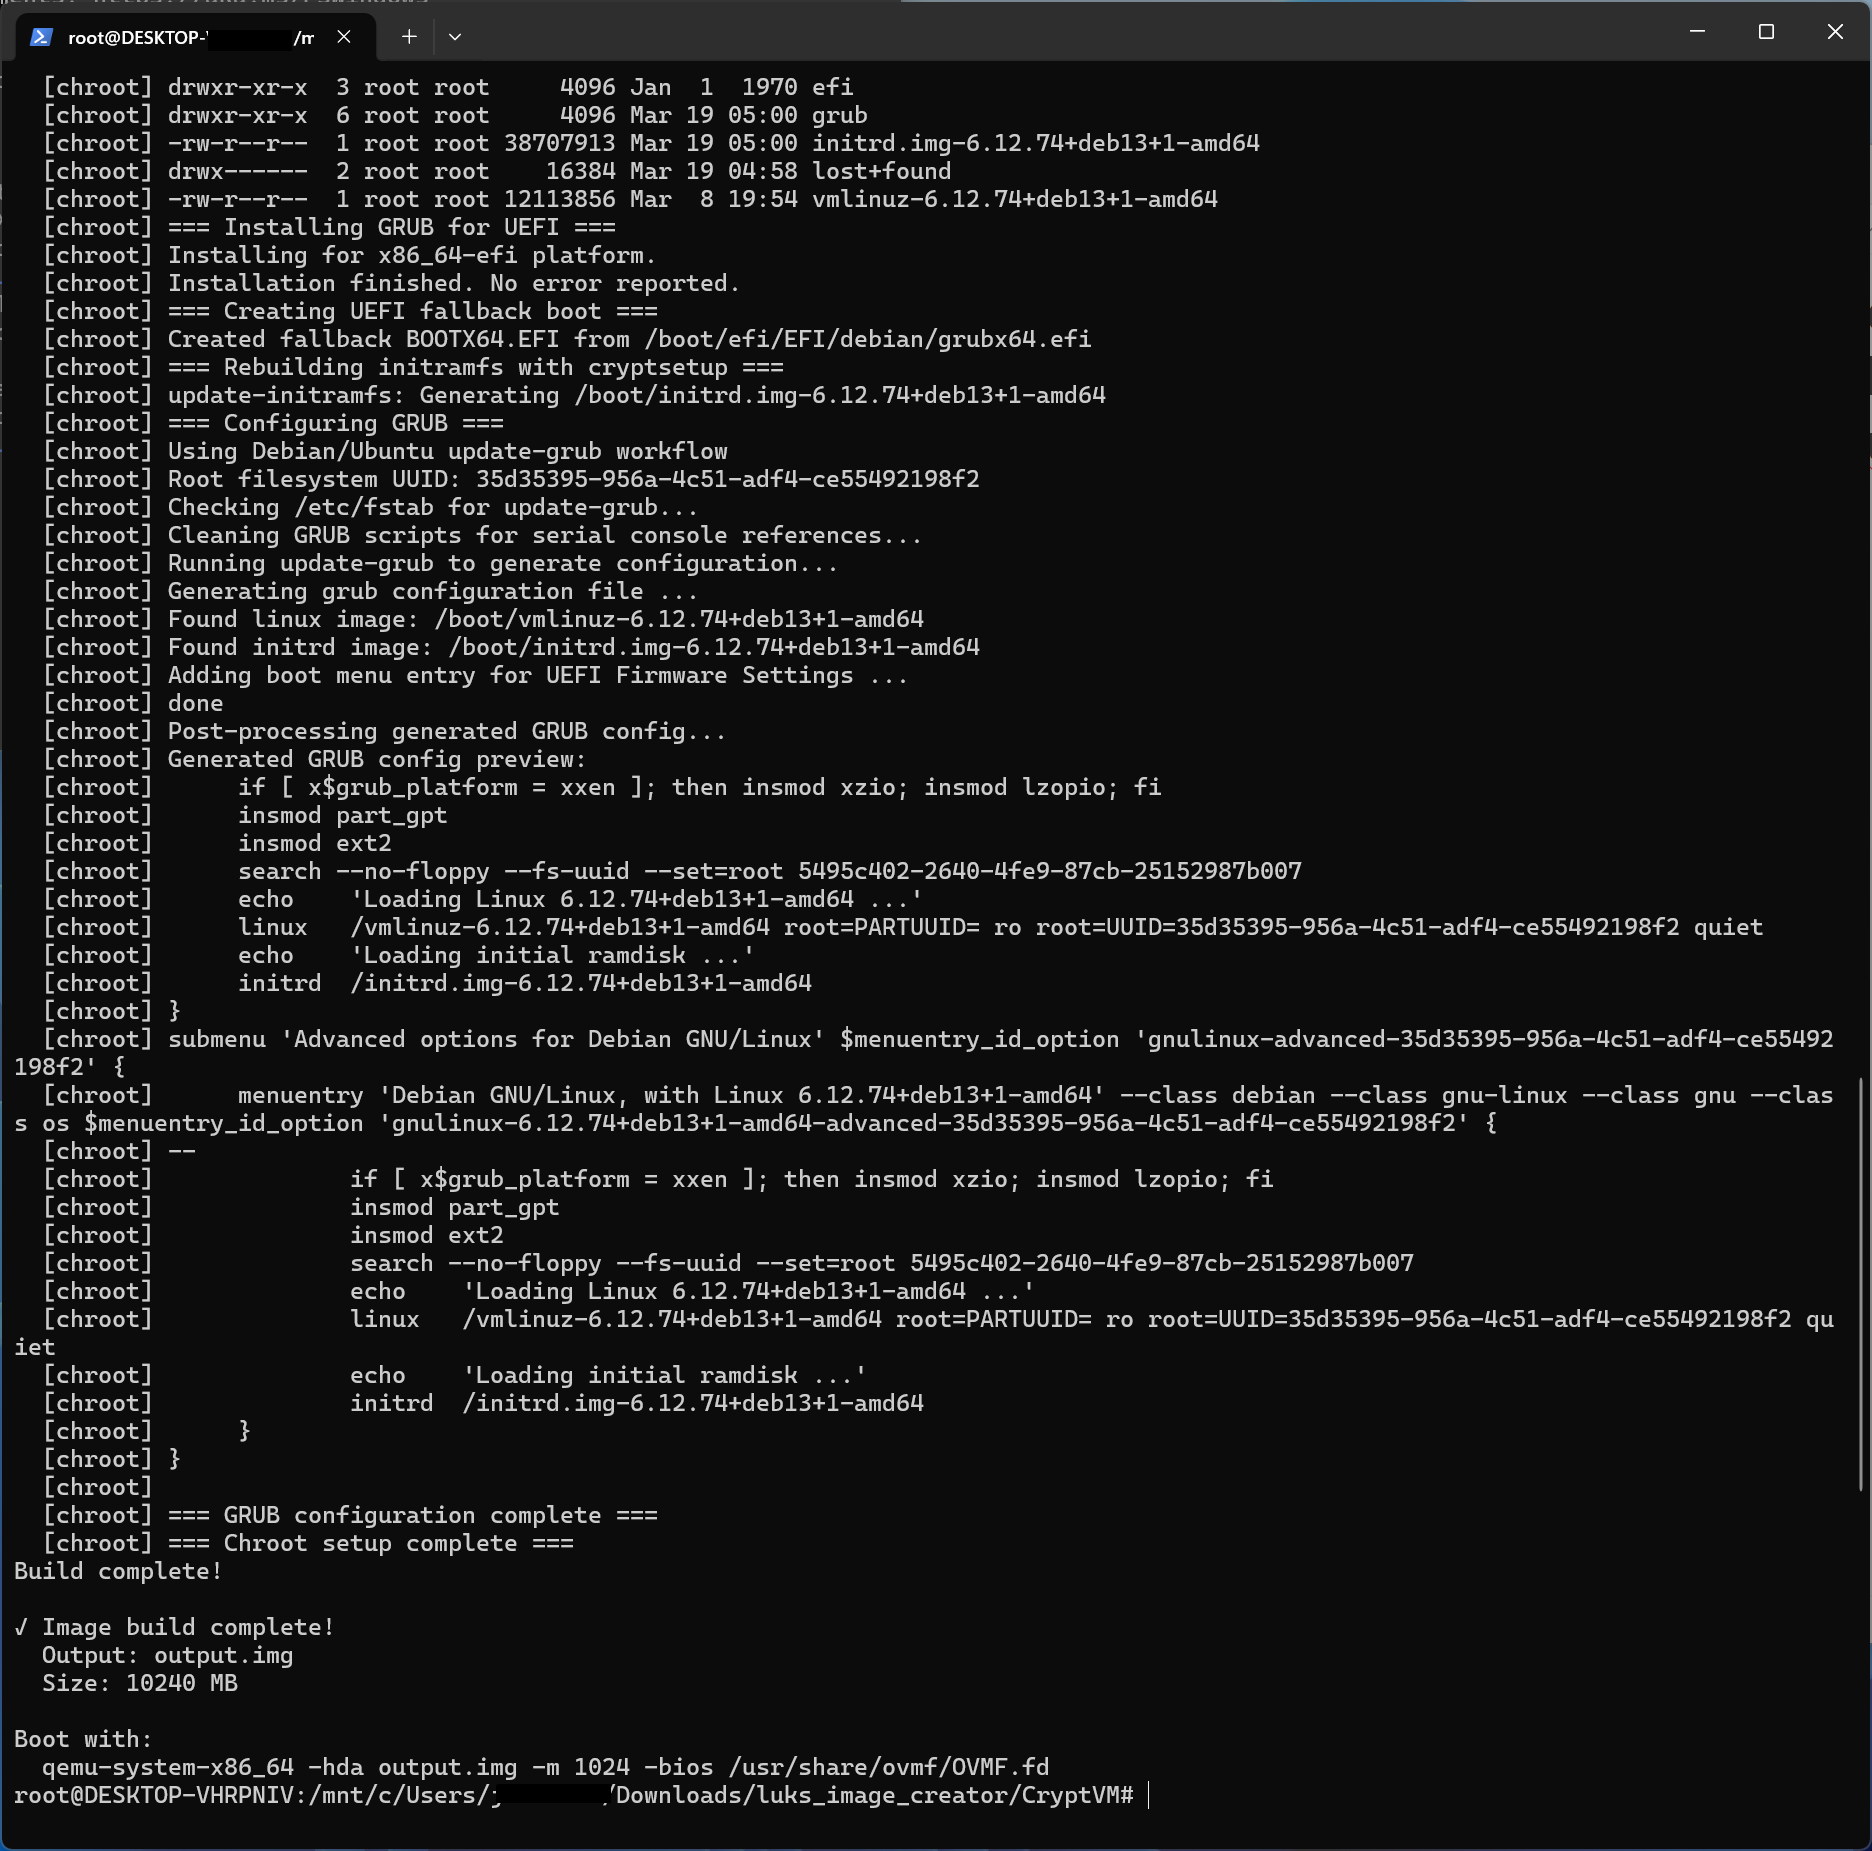
Your image is now ready!
You will have to upload it to the VPS. One method is booting your VPS into Rescue mode and using the "ssh" and "cat" to overwrite the VPS main block device with the new image.
Once you have setup rescue mode, simply do:
cat output.img | ssh root@<your_vps_ip_in_rescue_mode> "cat > /dev/sda"
Once finished, disable Rescue mode. Your VPS should boot into your new encrypted OS image. You will need to enable VNC to unlock the root disk on every reboot.
