This guide assumes that the VPS is running Ubuntu 24.04/Debian 13 or Almalinux/RHEL/Rocky 10 and later.
SEV-SNP may work in other Linux distributions but they are untested.
Enabling SEV-SNP will cause a CPU performance loss of about 10%. This was tested using Geekbench 6, where single core results dropped from 1900 points to 1700 points.
First enter your control panel:
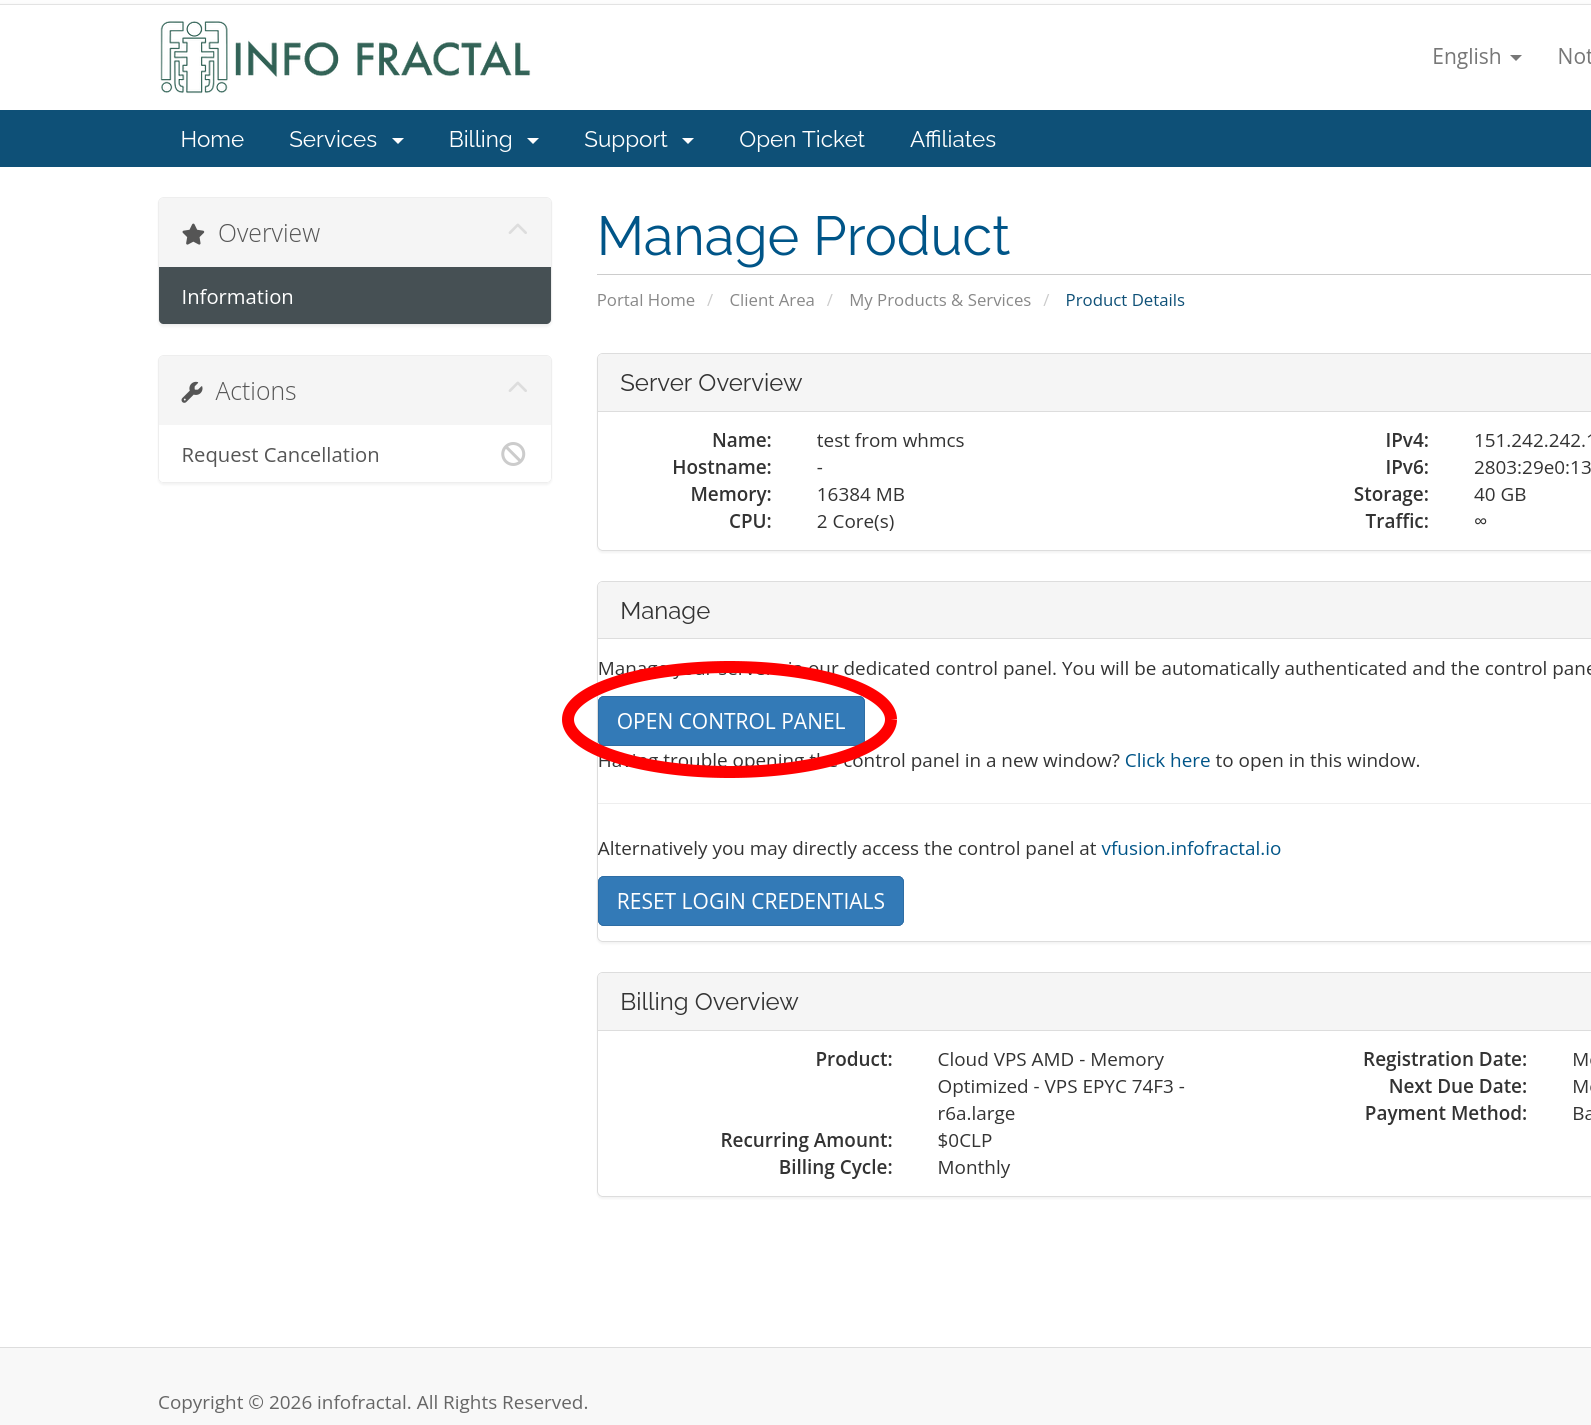
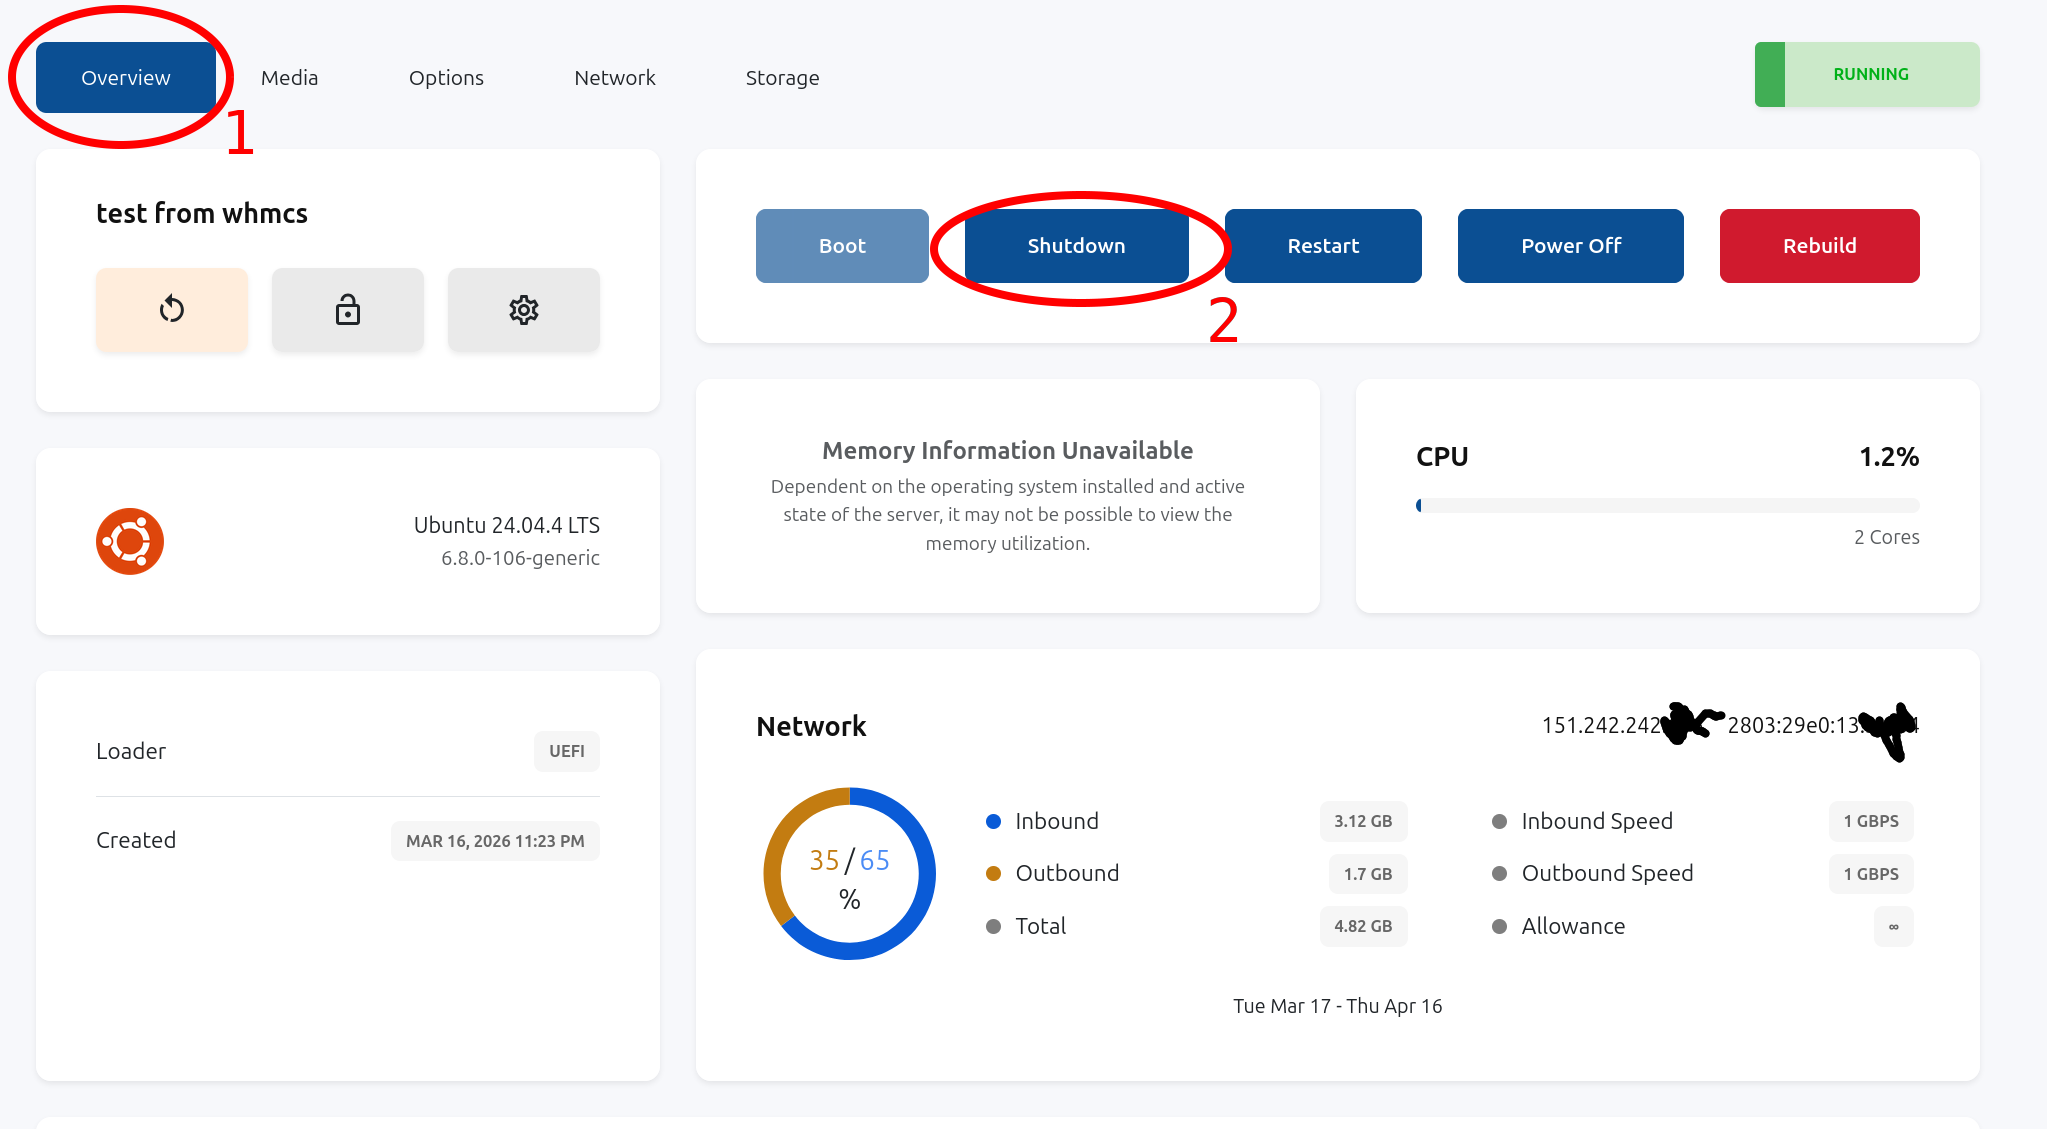
Poweroff your VPS:
Go to VPS "Options" and then "Settings":
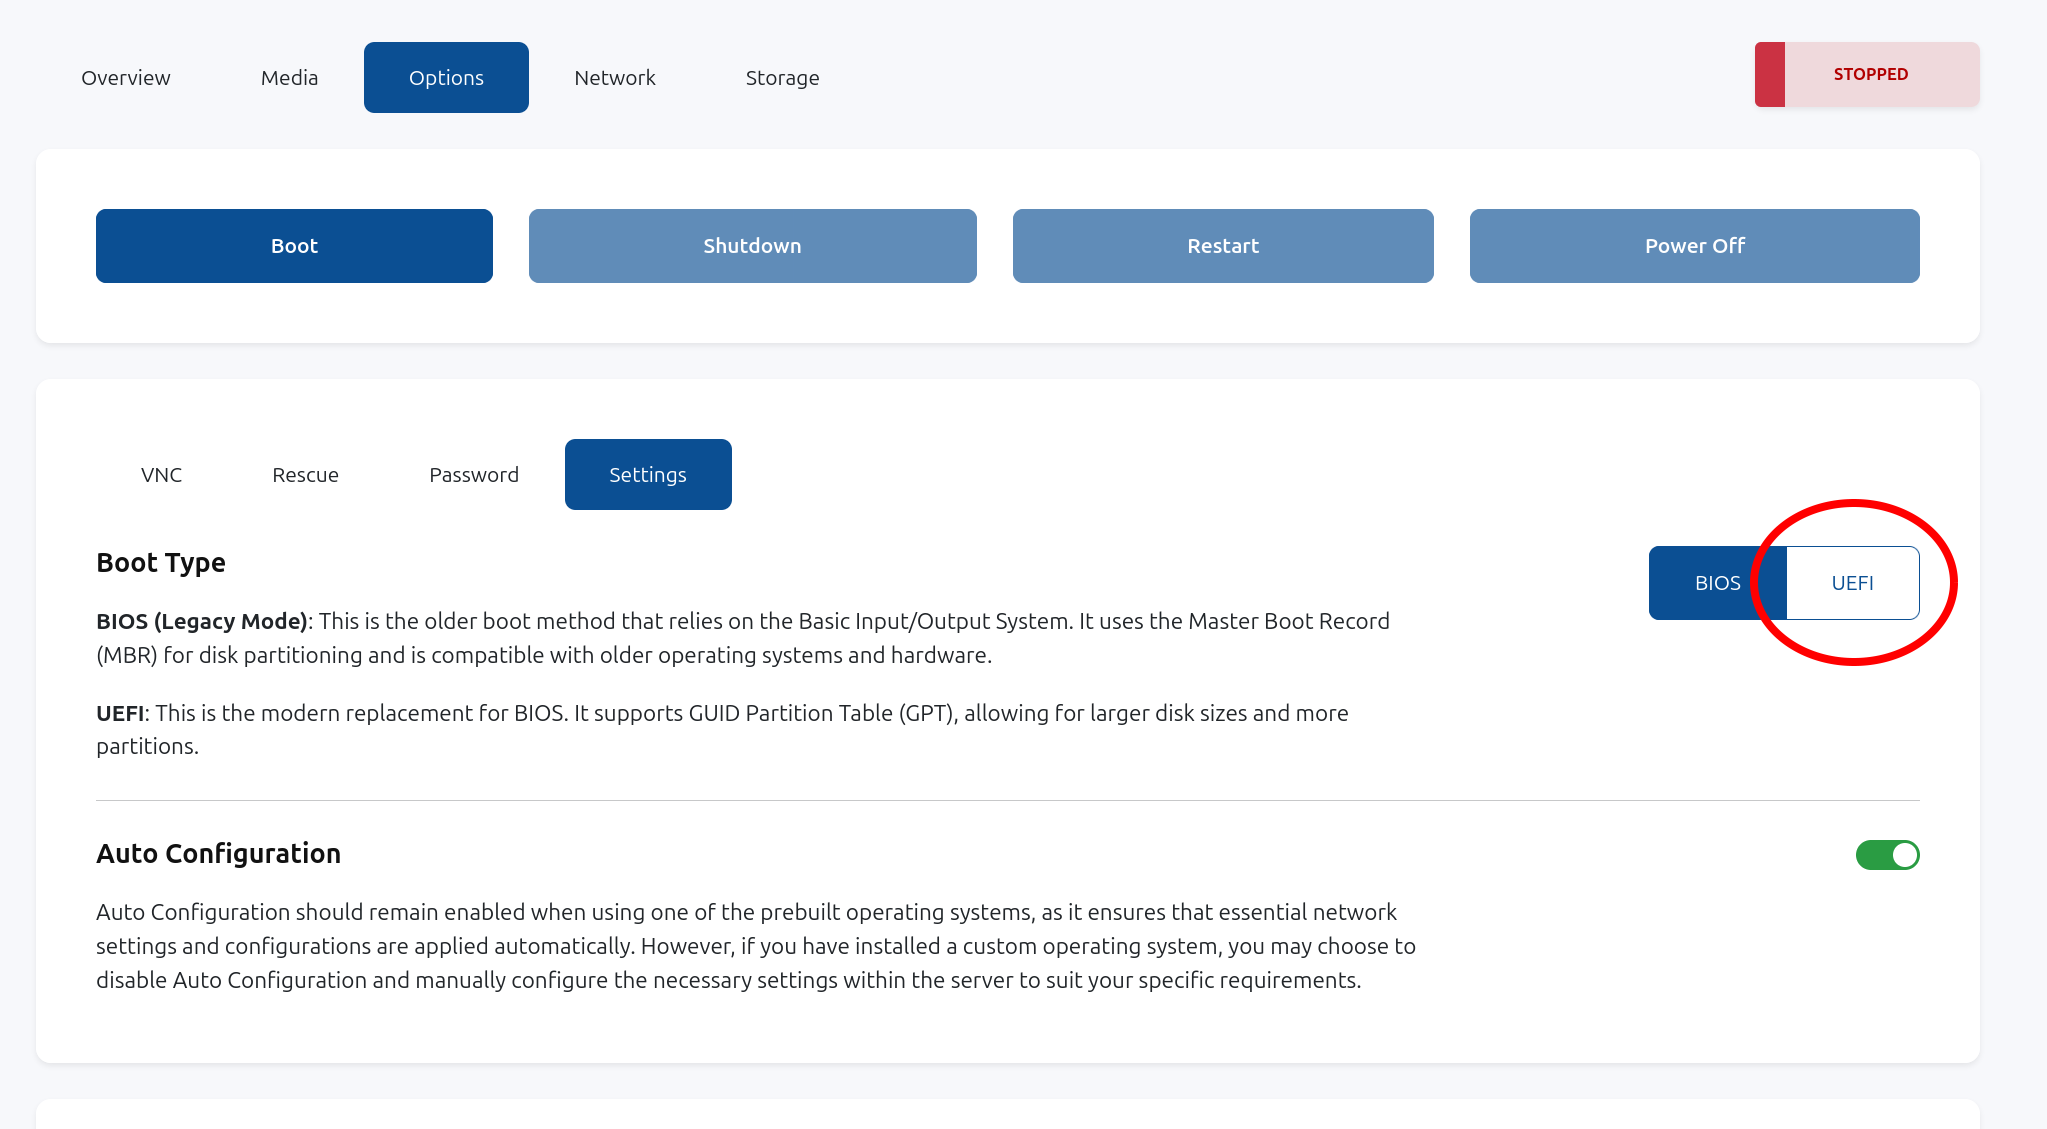
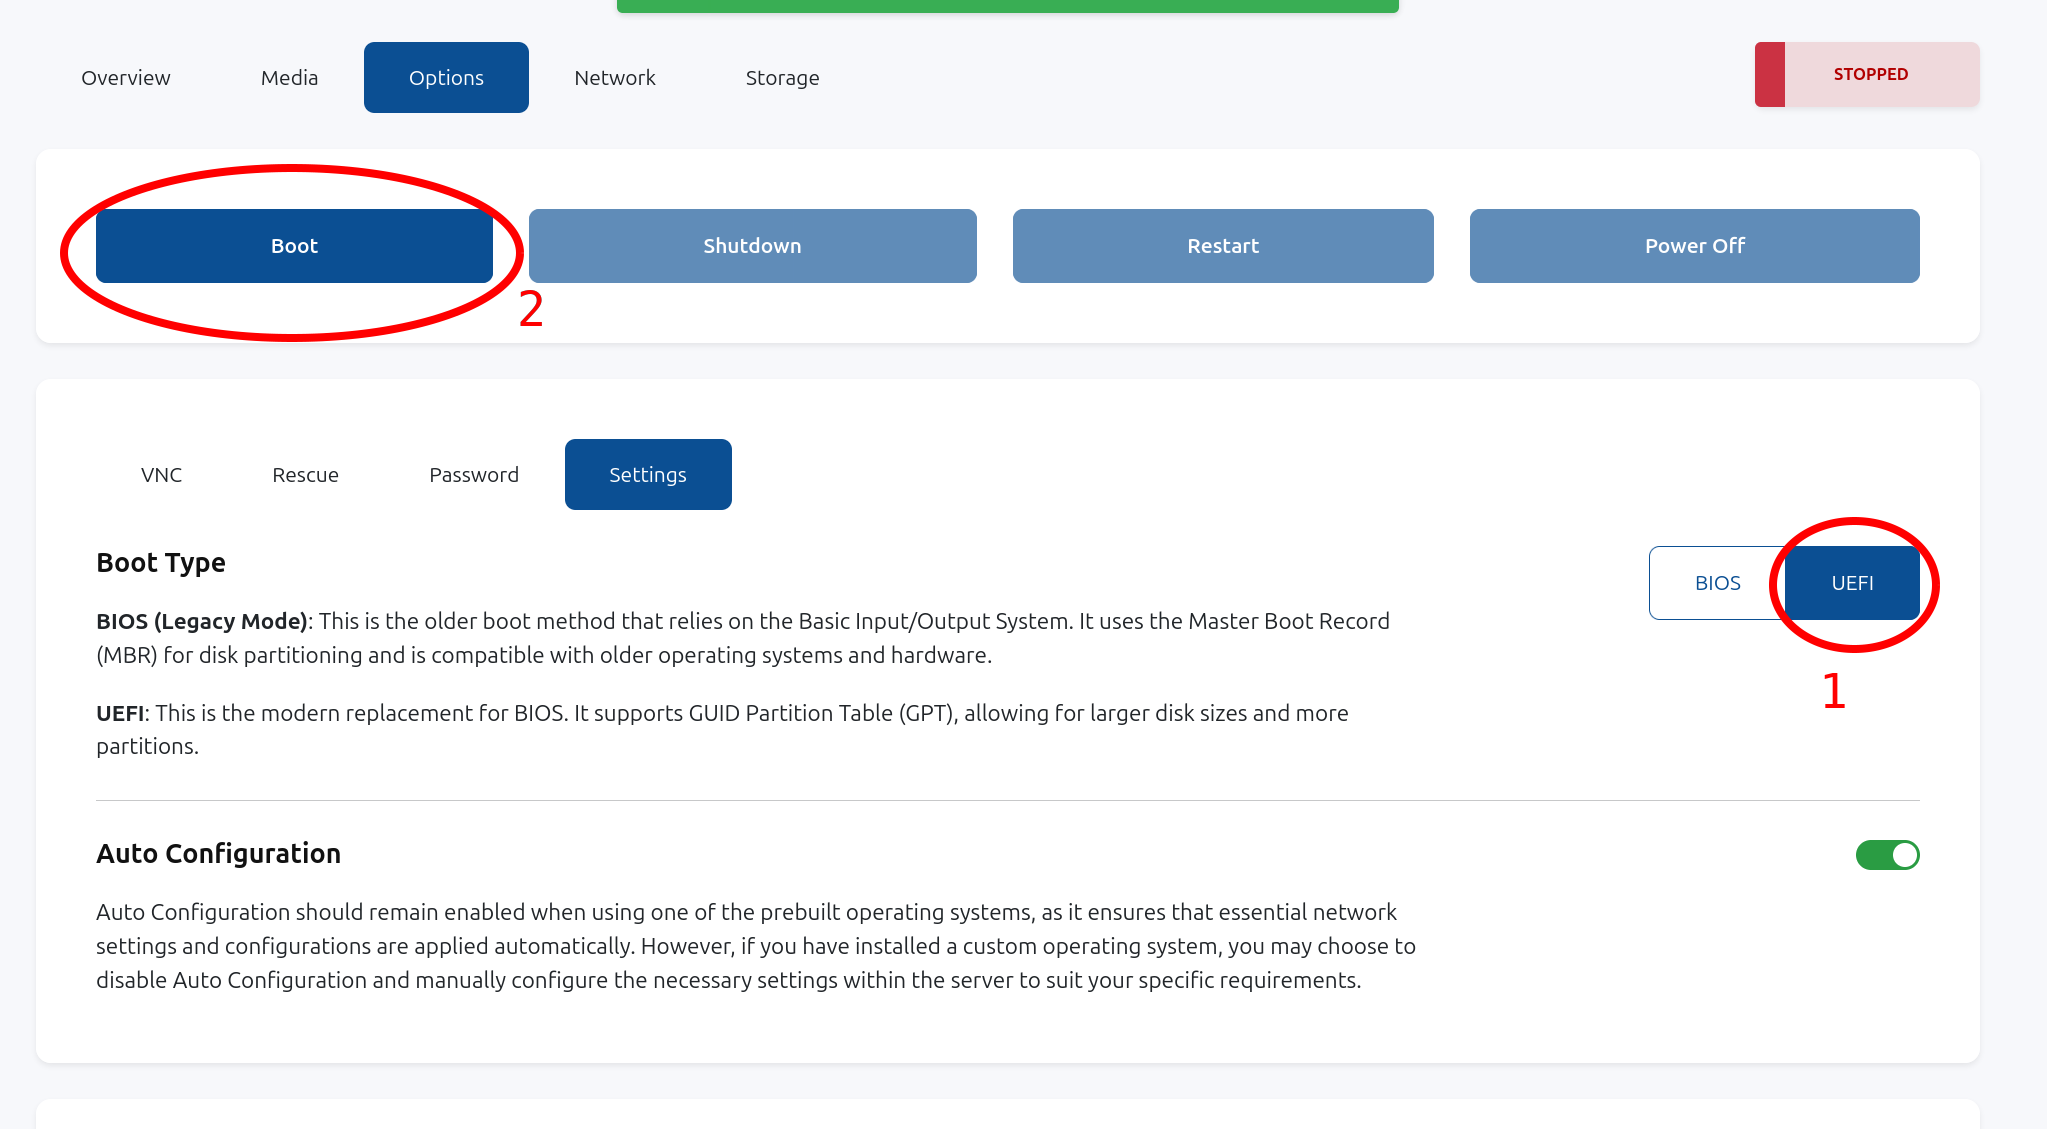
Select "UEFI" firmware. The system will automatically add SEV-SNP to the QEMU virtual machine configuration.
Then, click "Boot" to restart your VPS:
Finally, check in your VPS that SEV-SNP is detected and enabled using "dmesg | grep -i sev":
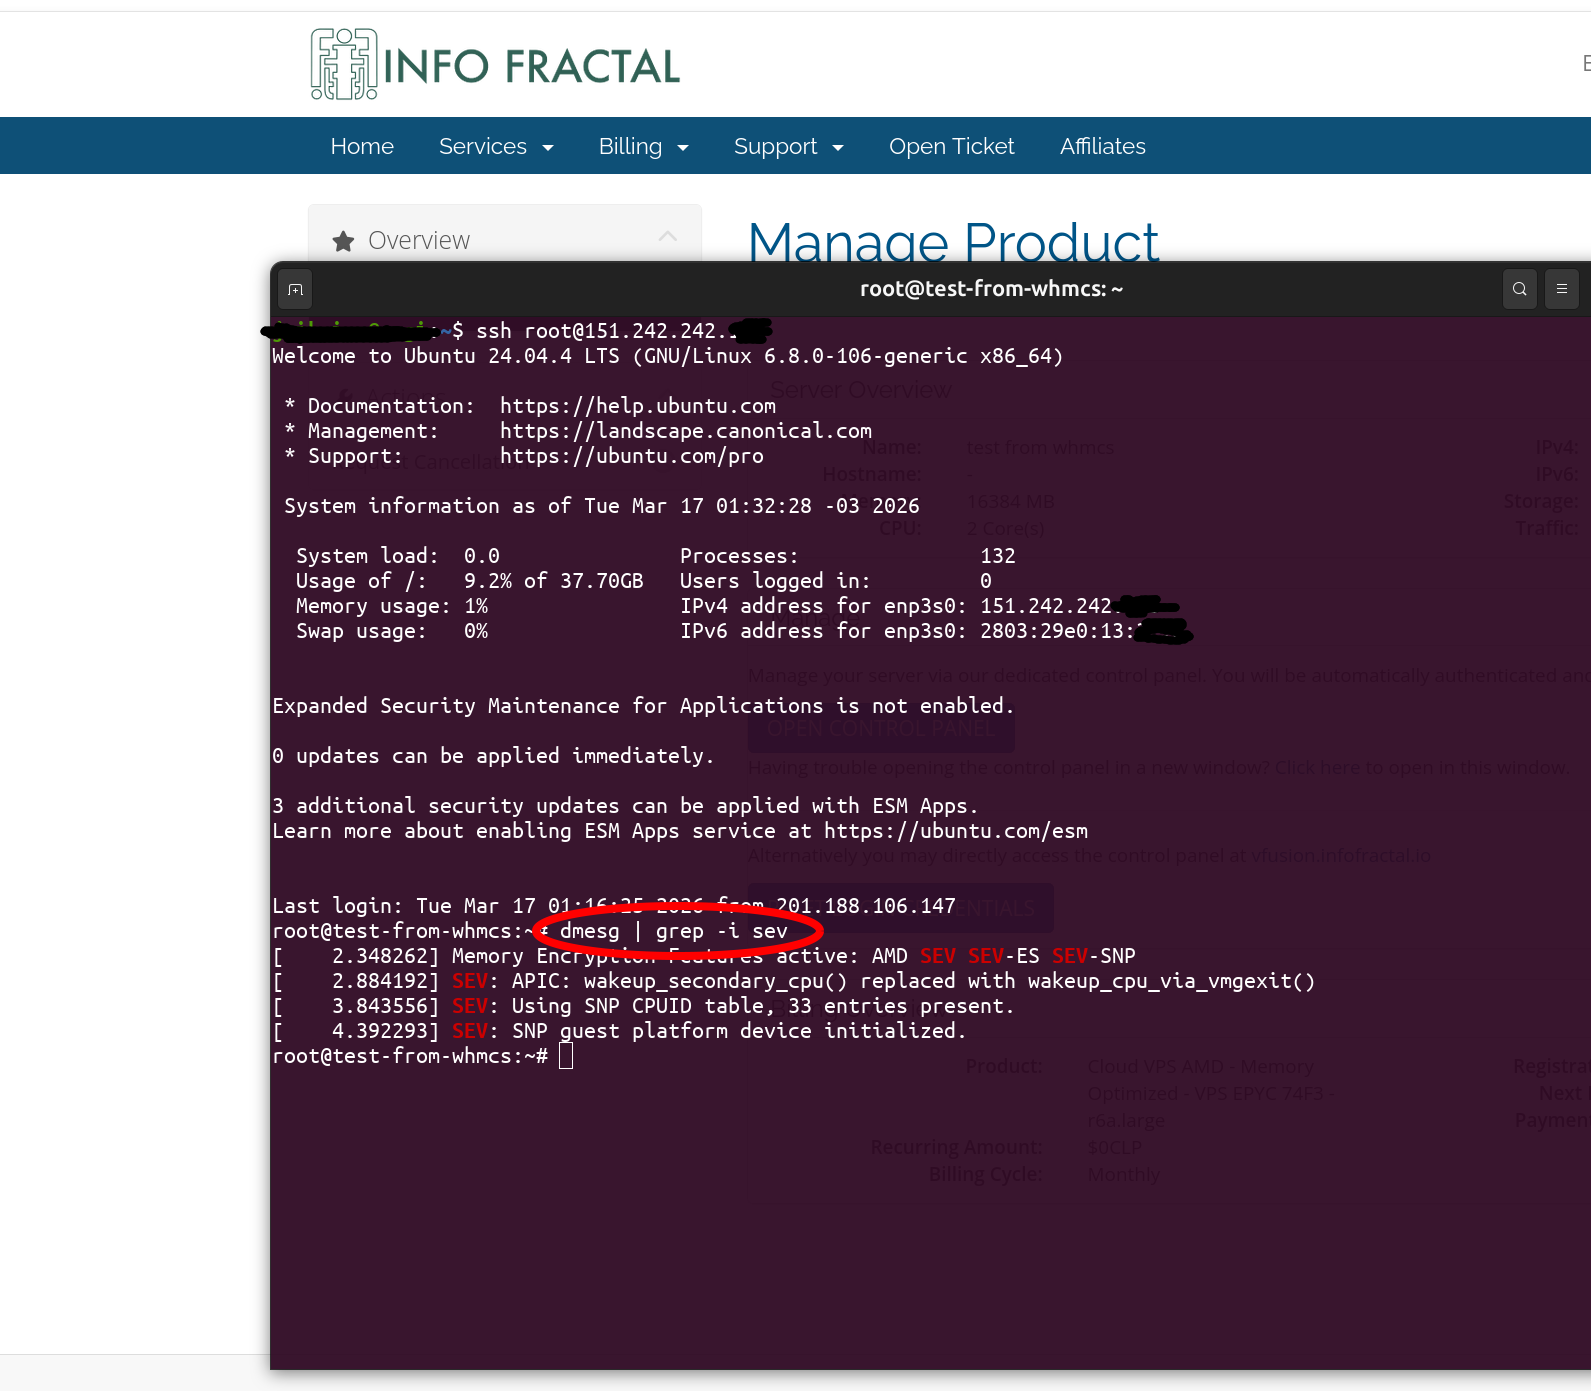
Congratulations! Now your VPS memory and register state are fully encrypted.
After enabling SEV-SNP, proceed to the next article to check the validity of the chain of trust.
