This article assumes you have already enabled SEV-SNP in your VPS following the previous guide.
We will follow the instructions to build the "snpguest" utility to verify the attestation.
1) Install cargo and rust in your VPS:
#Rust Installation, just press enter to install with default settings when asked
curl --proto '=https' --tlsv1.2 -sSf https://sh.rustup.rs | sh
#source the cargo binaries to the current path
source "$HOME/.cargo/env"
#clone the snpguest repository
git clone https://github.com/virtee/snpguest
#enter the directory and build the tool
cd snpguest
#build snpguest
cargo build -r
#change directory to ./target/release
cd ./target/release
#copy snpguest to /usr/local/bin or other valid $PATH:
cp snpguest /usr/local/bin
2) Downloading certificate and attesting:
#make sure the snp-guest driver is loaded. In Ubuntu 24.04 it requires the installation of the "linux-modules-extra" package
#If the sev device is present, run the following commands to fetch the certificates:
snpguest report report.bin request.bin --random
snpguest fetch vcek pem ./certs/ report.bin
snpguest fetch ca pem ./certs/ Milan
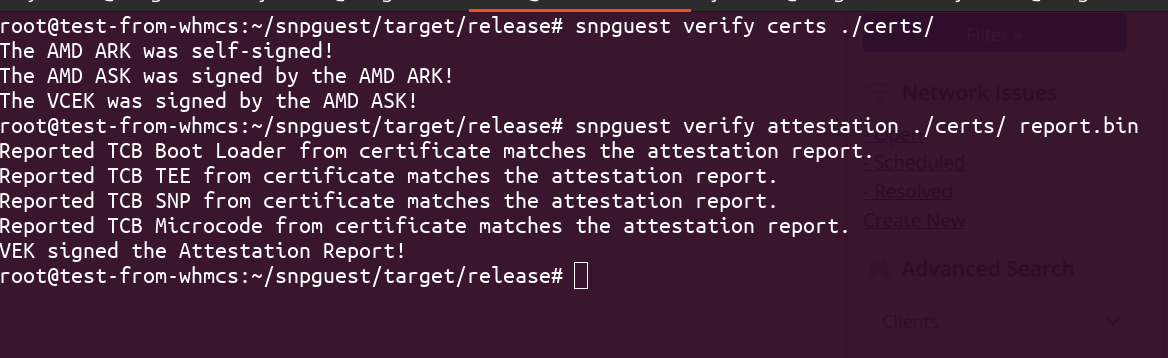
#Finally we can verify the attestation
snpguest verify certs ./certs/
snpguest verify attestation ./certs/ report.bin
If your output matches then your VPS encryption is now fully attested.